Signed up, staring at an empty store, no idea what happens first?
31 August 2026 · 11 min read

Making the thing was the hard part, or at least that is what you told yourself. The PDF is written. The course is recorded. The community has a name. Then you sign up somewhere to sell it, land on an empty dashboard with eight tabs down the left, and the momentum you had at eleven last night is gone.
It is not that any single step here is difficult. It is that nobody lays them out in order, so you do them in the wrong one, and find out on the day it matters. This is the whole thing in order, from an account that does not exist yet to money sitting in your bank account, including the one step almost everybody leaves until a buyer is already trying to pay them.
Why the first day goes wrong

Here is the version that plays out most often. Somebody builds the store in one enthusiastic evening. Product uploaded, colours chosen, cover image swapped four times. They publish it, put the link in their bio, and post about it that night, because the whole point was to stop delaying.
The next morning there are two messages asking whether the link is broken. It is not broken. The store is live and the Buy button does not work, because payouts were never set up, and a store with nowhere to send the money will not take any. From the creator side nothing looks wrong. The store loads. The product is there. You only find out because somebody was kind enough to tell you instead of quietly leaving.
Payout verification takes a day or two, because a real bank account is being checked by a real payment partner. That is not a queue you can skip on launch morning. It is, however, a queue you can start on day one and forget about while you do everything else, which is why it appears where it does below.
The whole thing, in order
Six steps. Four of them are you making decisions about your own product, and two are admin. Nothing here needs a website, a domain, a developer or a designer.
- Claim your link and pick a plan. Your username is your storefront address, and the free plan has no monthly bill.
- Add the first product. Choose the type, set a price, upload the thing.
- Make the store look like you. Layout, colours, fonts, cover, links.
- Set up payouts. Identity and bank details, then a day or two of verification.
- Publish and share the link. Bio, stories, wherever your people already are.
- Watch the orders and the settlements. Sale today, bank two business days later.
Step 1: Claim your link and pick a plan
Signing up asks for very little. The part worth thinking about for more than a second is your username, because it becomes your storefront address, the thing you will paste into your Instagram bio and read out on camera. Short, spelled how it sounds, and the same handle you already use elsewhere if it is free. You can change it later from settings, but every link you have already shared will keep pointing at the old one, and nobody updates a bio link twice.
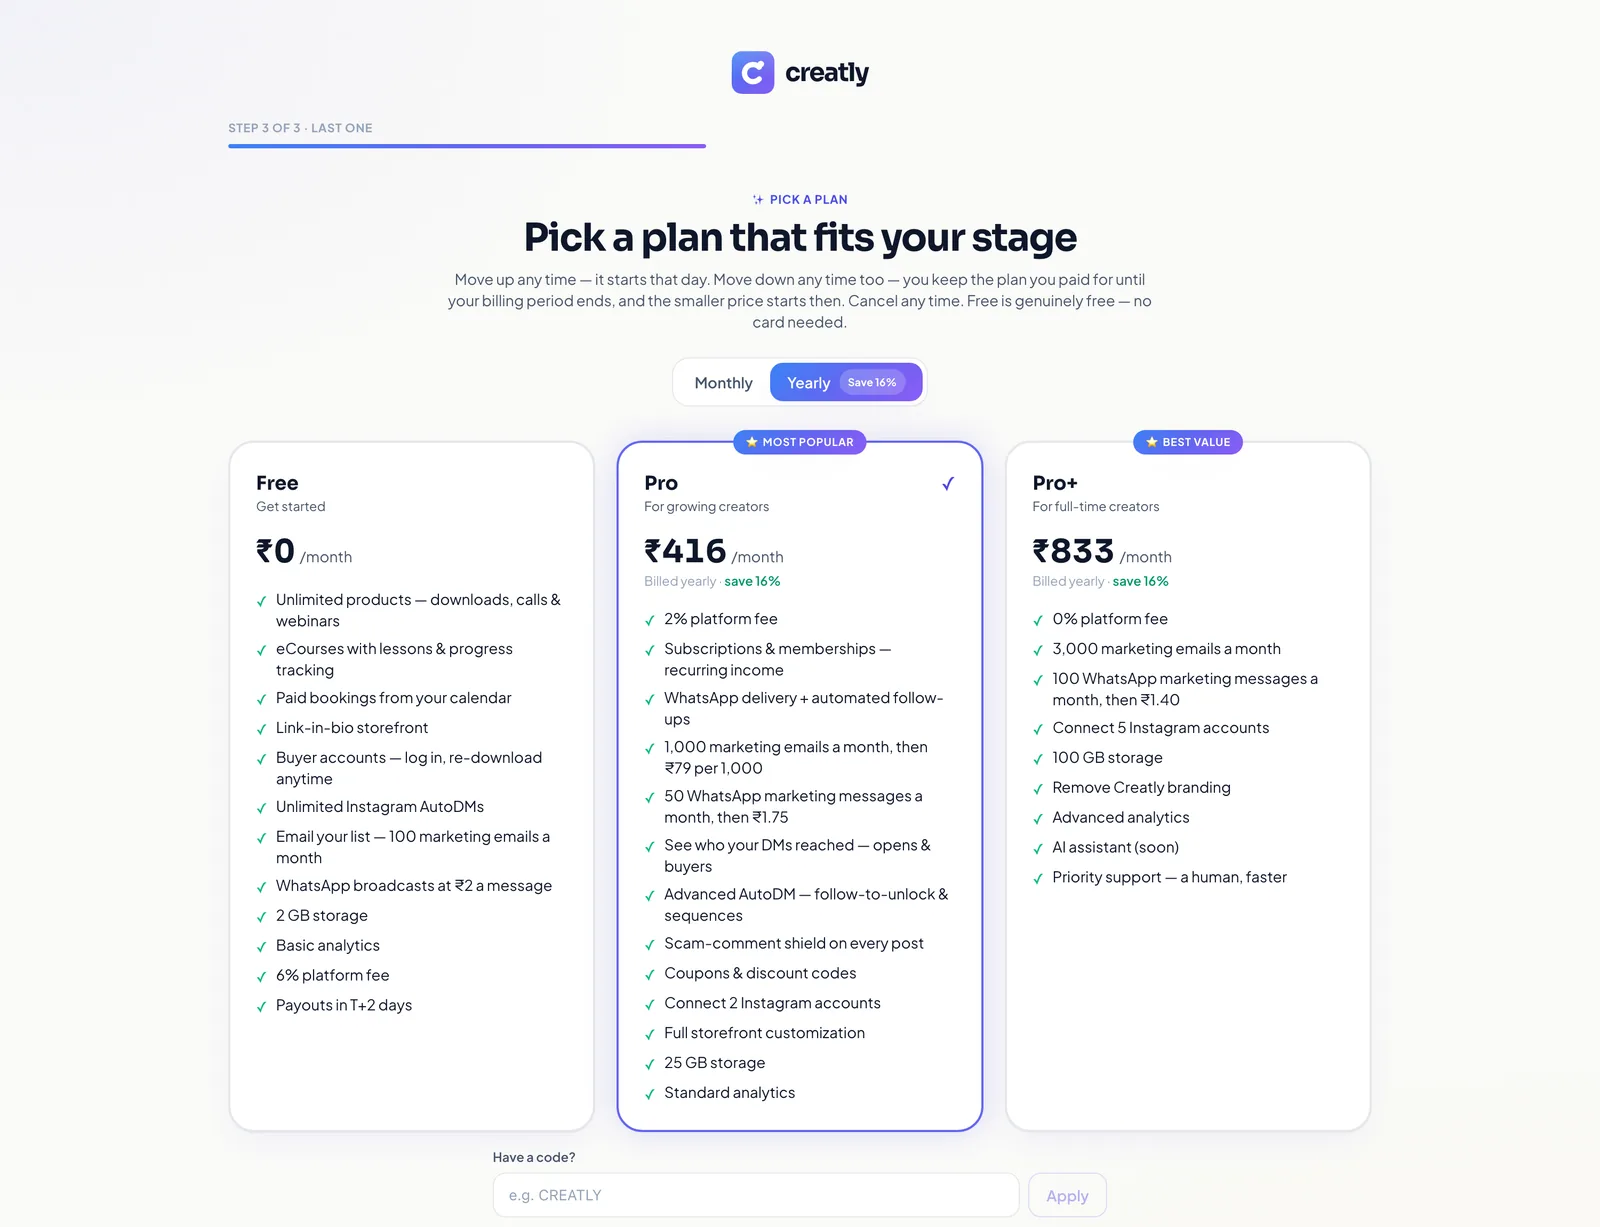
Take the free plan. Not as a hedge, but because it is the correct choice when you have not sold anything yet: unlimited products, and a fee that only exists when a sale does. There is no monthly number working against you while you are still writing the product description. The two reasons people move up are storage, since video is what eats it, and delivery on WhatsApp instead of email. Both of those are decisions you can make in your second month with actual information, rather than in your first with a guess.
Step 2: Add the first product
Products, then New, and the first thing you are asked is what kind of thing this is. Worth slowing down for, because the type decides what the buyer gets and what you have to do afterwards.
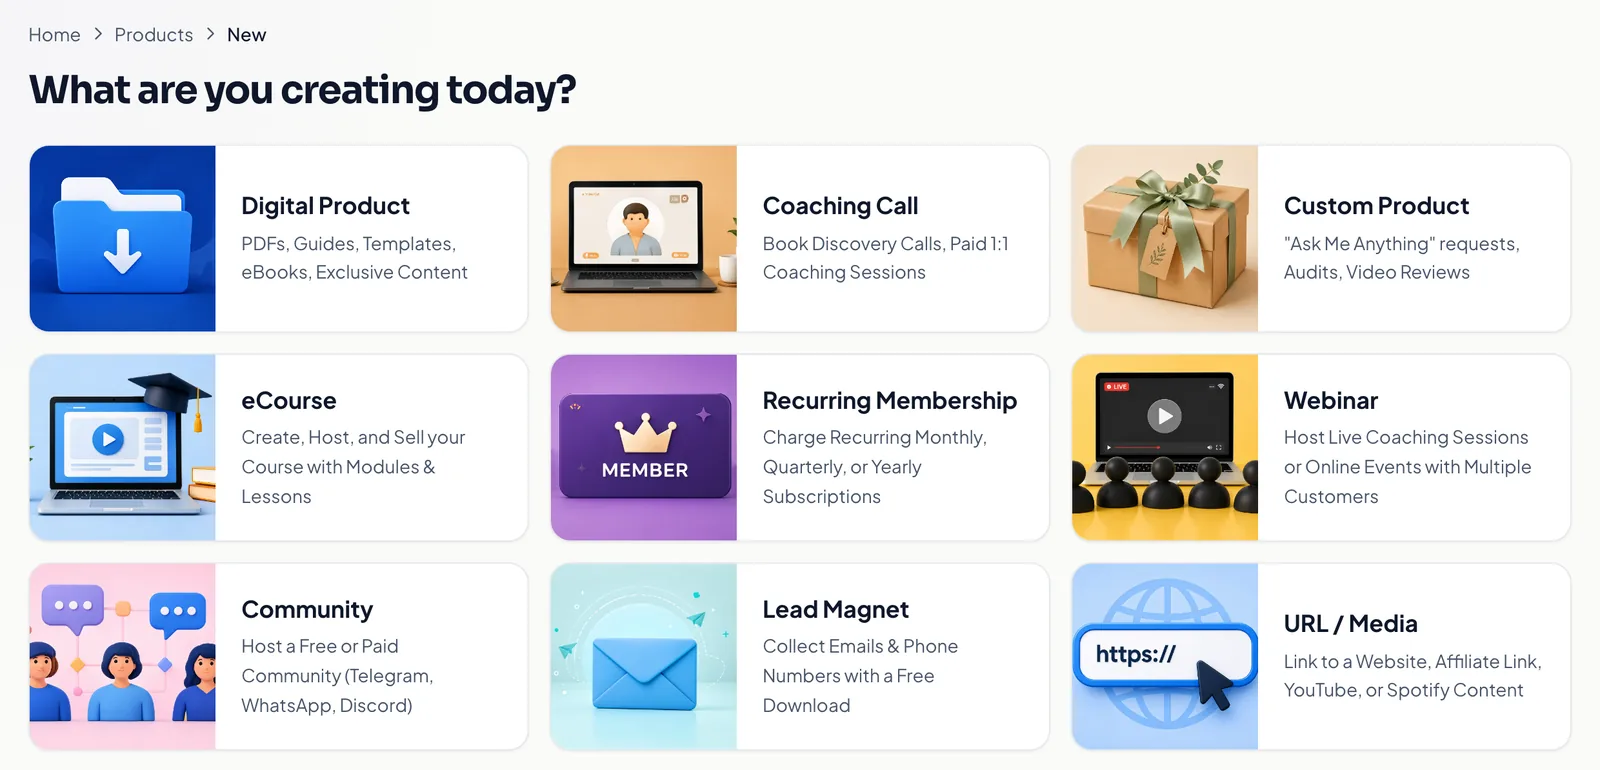
A digital file is the simple one: they pay, they get a secure download link. A course gets modules, a player, saved progress and a completion certificate, which is why selling a course as a zip of videos is the most common expensive mistake on this screen. A community connects to your Telegram group or Discord server and adds people when they pay, removing them when they stop. A coaching call puts your actual calendar in front of the buyer and takes the booking.
Then price it, and resist the urge to agonise. Your first price is a hypothesis, not a commitment, and you can change it in ten seconds once you have watched a few people either buy or not. What matters more is the description, because it is doing the selling while you are asleep. Write what changes for them after they have it, not what is inside it.
Step 3: Make the store look like you
Customise is where the store stops being a template. Pick a layout, set the colours and fonts, add your photo and a cover, and drop in your social links. The preview beside you is the real storefront rendering as you change things, not an approximation of it, so what you see is genuinely what a buyer will get on their phone.
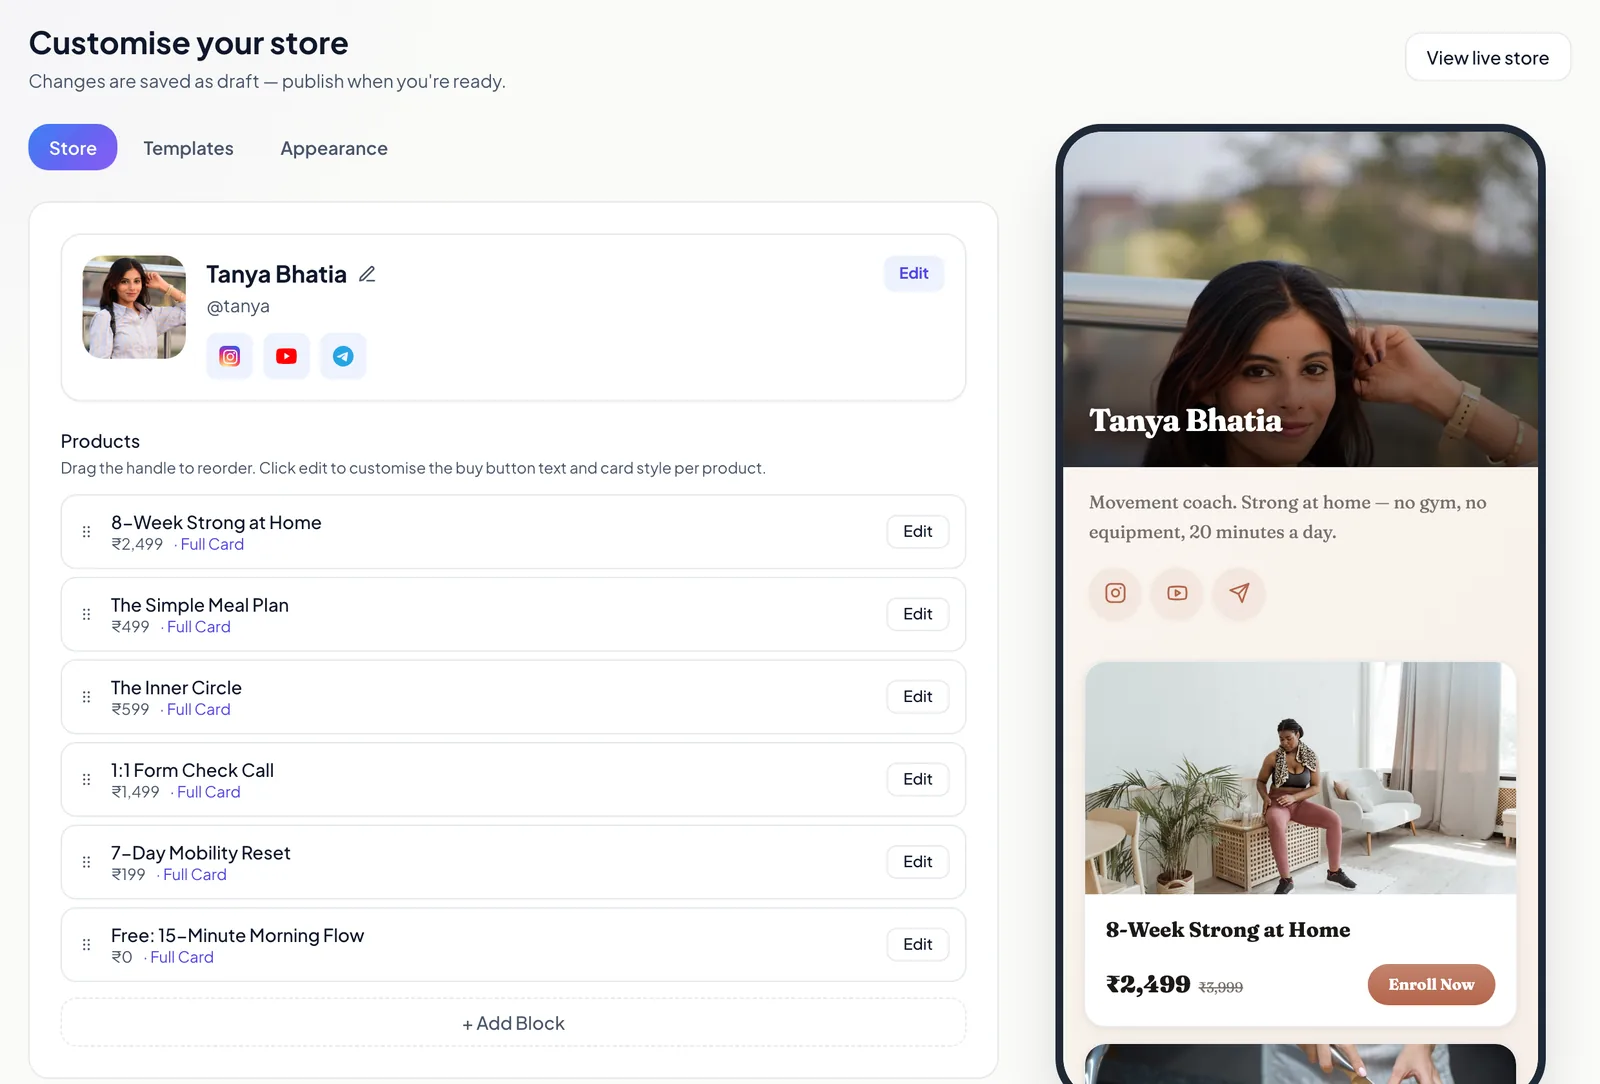
Give this twenty minutes and then stop. Nobody has ever failed to sell because their accent colour was slightly wrong, and plenty of people have spent three days here and never published. The two things that genuinely matter are a face and a sentence: a real photo of you, and a line under it that says who you help and with what. Everything else is decoration.
Step 4: Set up payouts, before you need them
This is the step to do early, and the one everyone does late. Open the Payouts tab and it will tell you plainly that your store cannot receive sales yet.
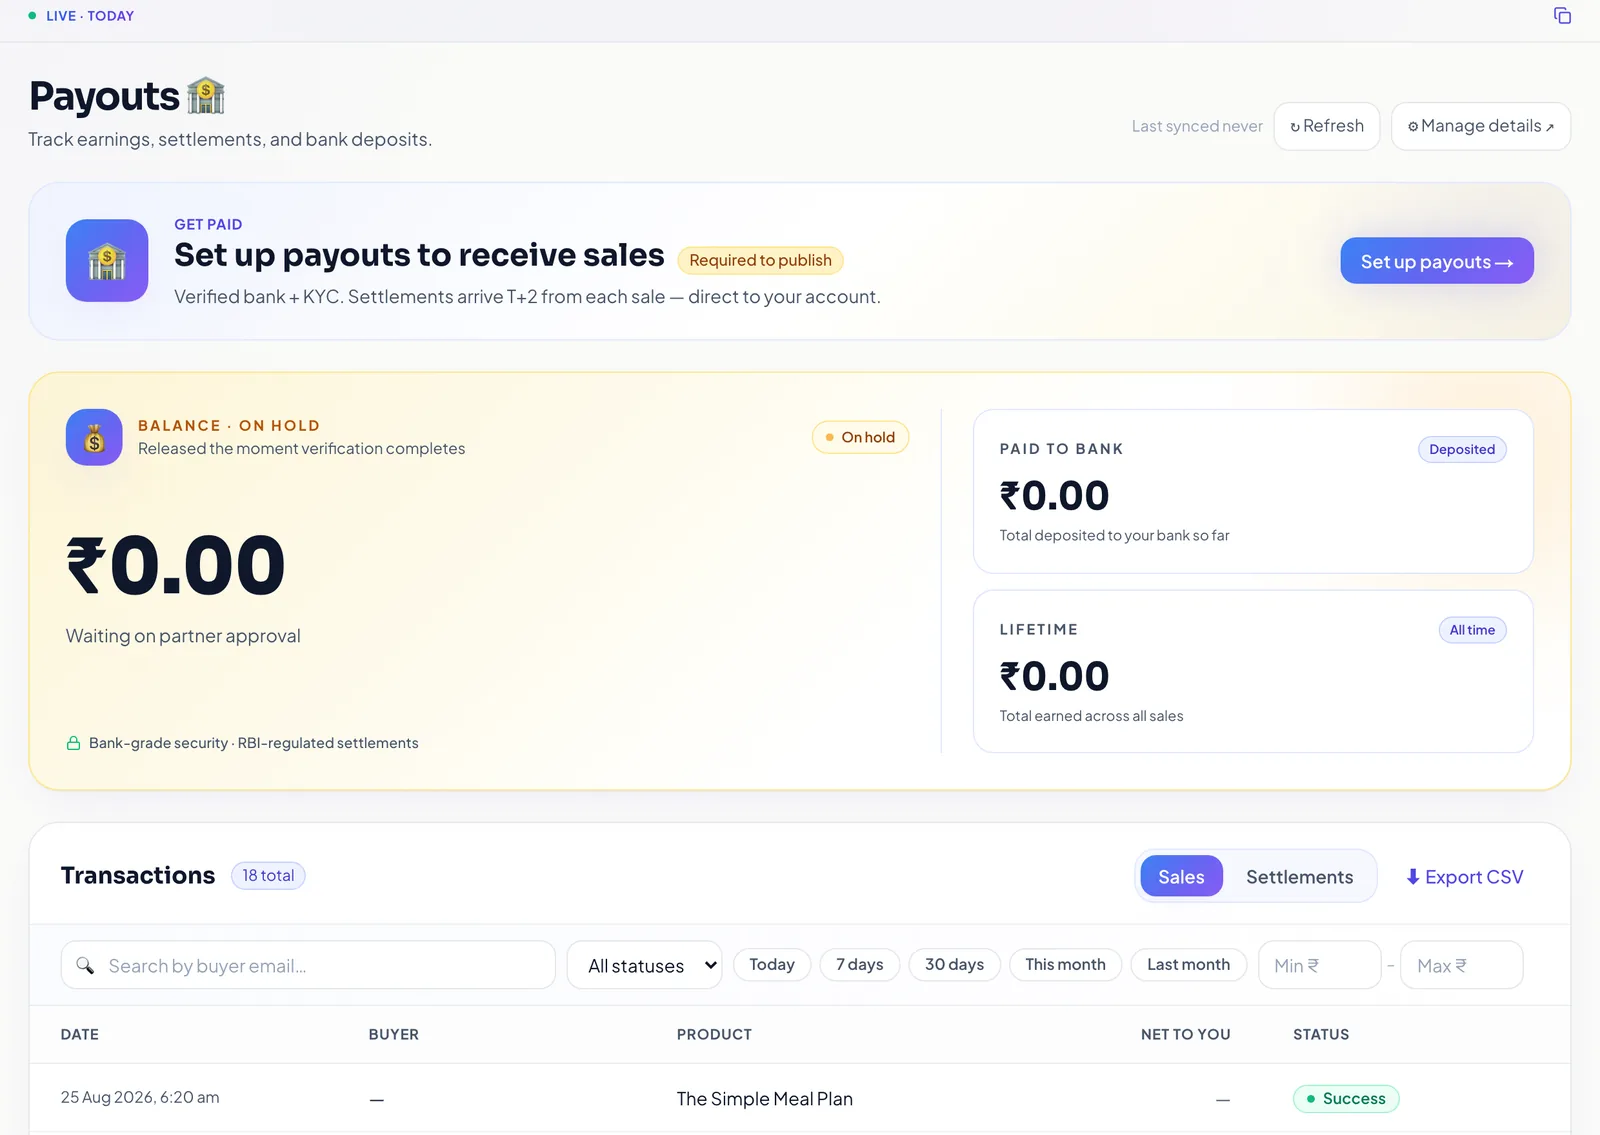
You choose a payment partner, then hand over identity and bank details. It is a single form and it takes about five minutes if the details are in front of you.
What it asks for: your full name, email and phone, whether you are an individual or a business, your PAN, your registered address, and the account the money should land in, meaning account holder name, account number, IFSC and account type. GSTIN only if you have one. Nothing is charged until your first sale.
Then it goes off to be verified, and that is the bit with a clock on it. Usually one to two business days, because your bank account is being validated rather than merely written down. While it runs, your balance shows as on hold and your store still cannot complete a purchase.
Which is the whole argument for doing this on day one. The verification runs in the background while you write your product description and argue with yourself about fonts, and by the time you are ready to share the link, it is done. Do it in the other order and you find out on launch day, in public, from somebody who wanted to give you money.
Step 5: Publish and share the link
Publish, and the store is live at your link. That is the whole deployment story. No hosting, no domain, no build.
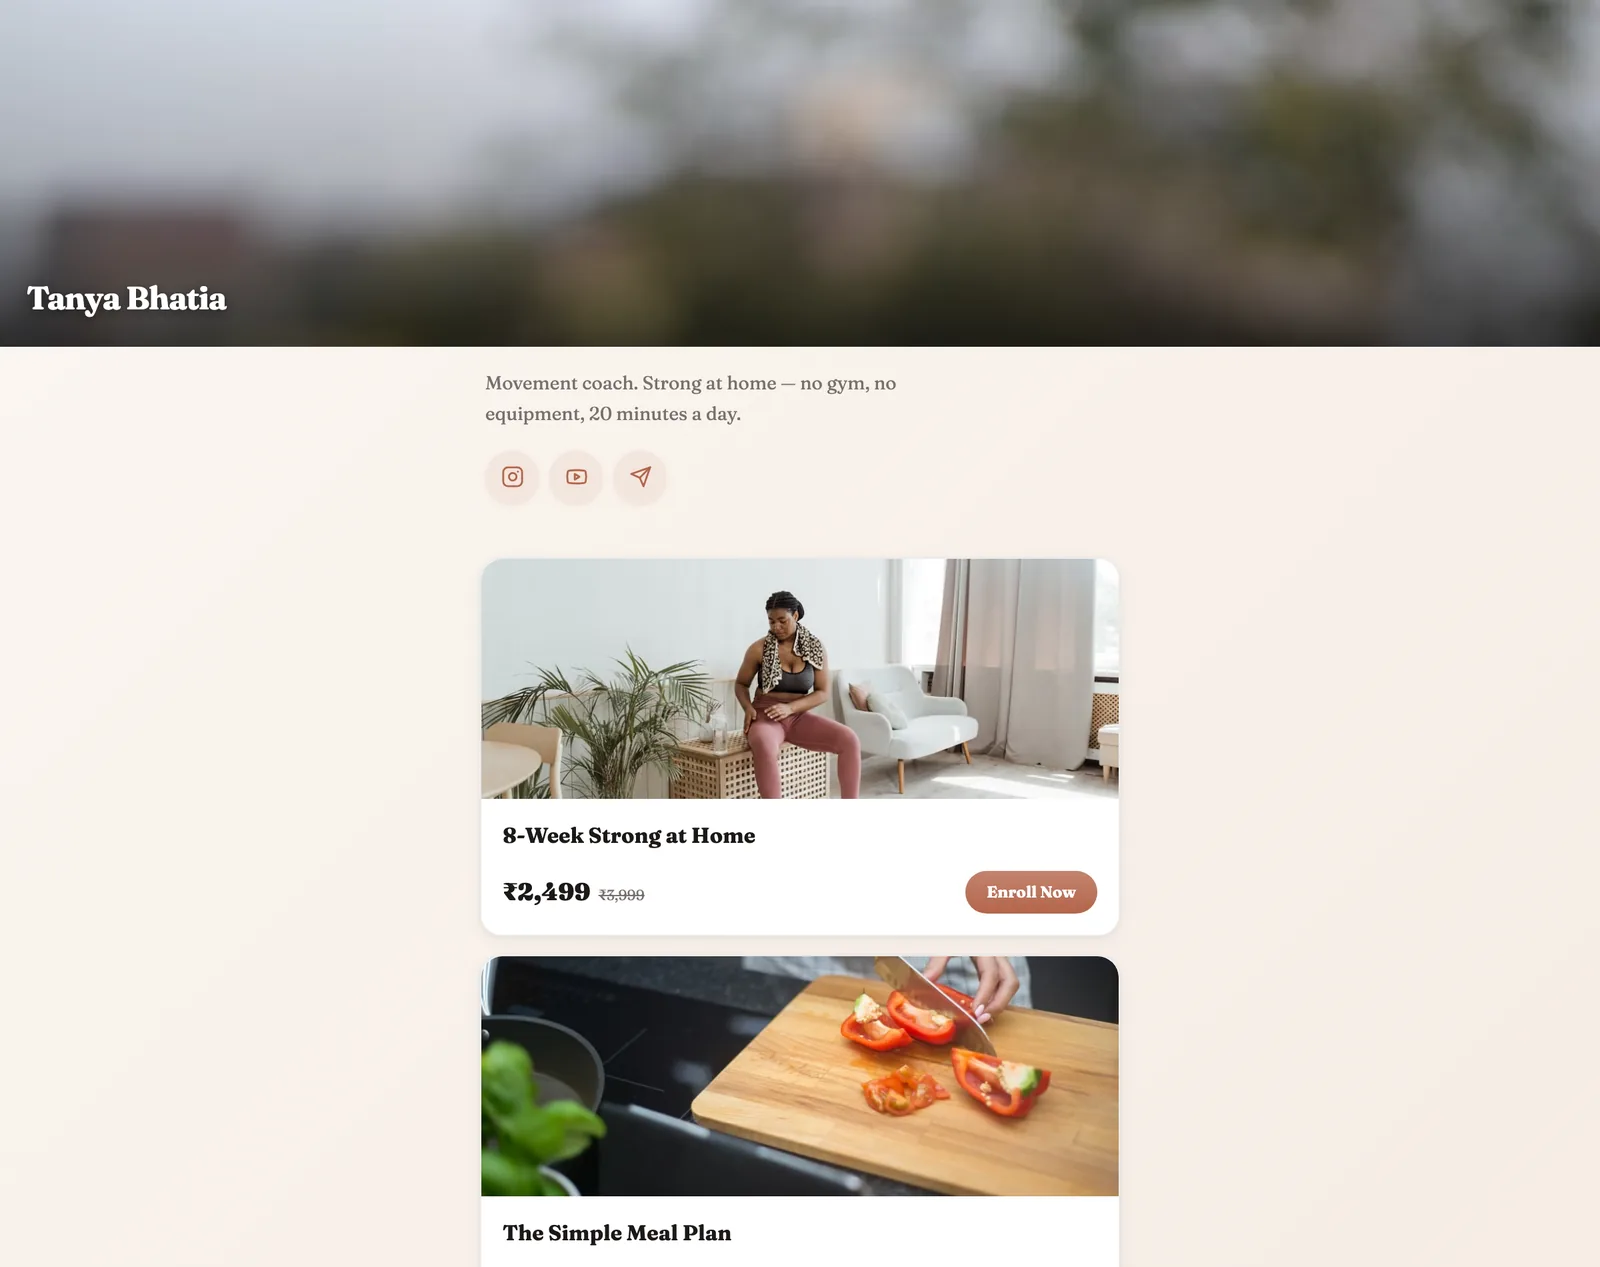
Open it on your own phone first and buy something from yourself. It takes two minutes, and it is the only way to know that checkout completes and delivery lands, rather than assuming. You will also see exactly what your buyer sees, which tends to fix two or three small things you would never have spotted from the dashboard.
Then put the link where your people already are. Instagram bio, YouTube description, WhatsApp status, the pinned message in your group. One link for everything you sell, which is the reason you do not need to update anything when you add a second product. And when a post does well, Instagram comments can send that link automatically instead of you replying two hundred times by thumb.
What happens the moment somebody pays
Nothing, from you. That is the actual answer, and it is worth stating plainly because it is the difference between selling and doing admin badly at midnight.
The screenshot below is your buyer's side of it. Name, email, number, pay. Notice the line under the number field, because it is the promise the whole checkout is making on your behalf.
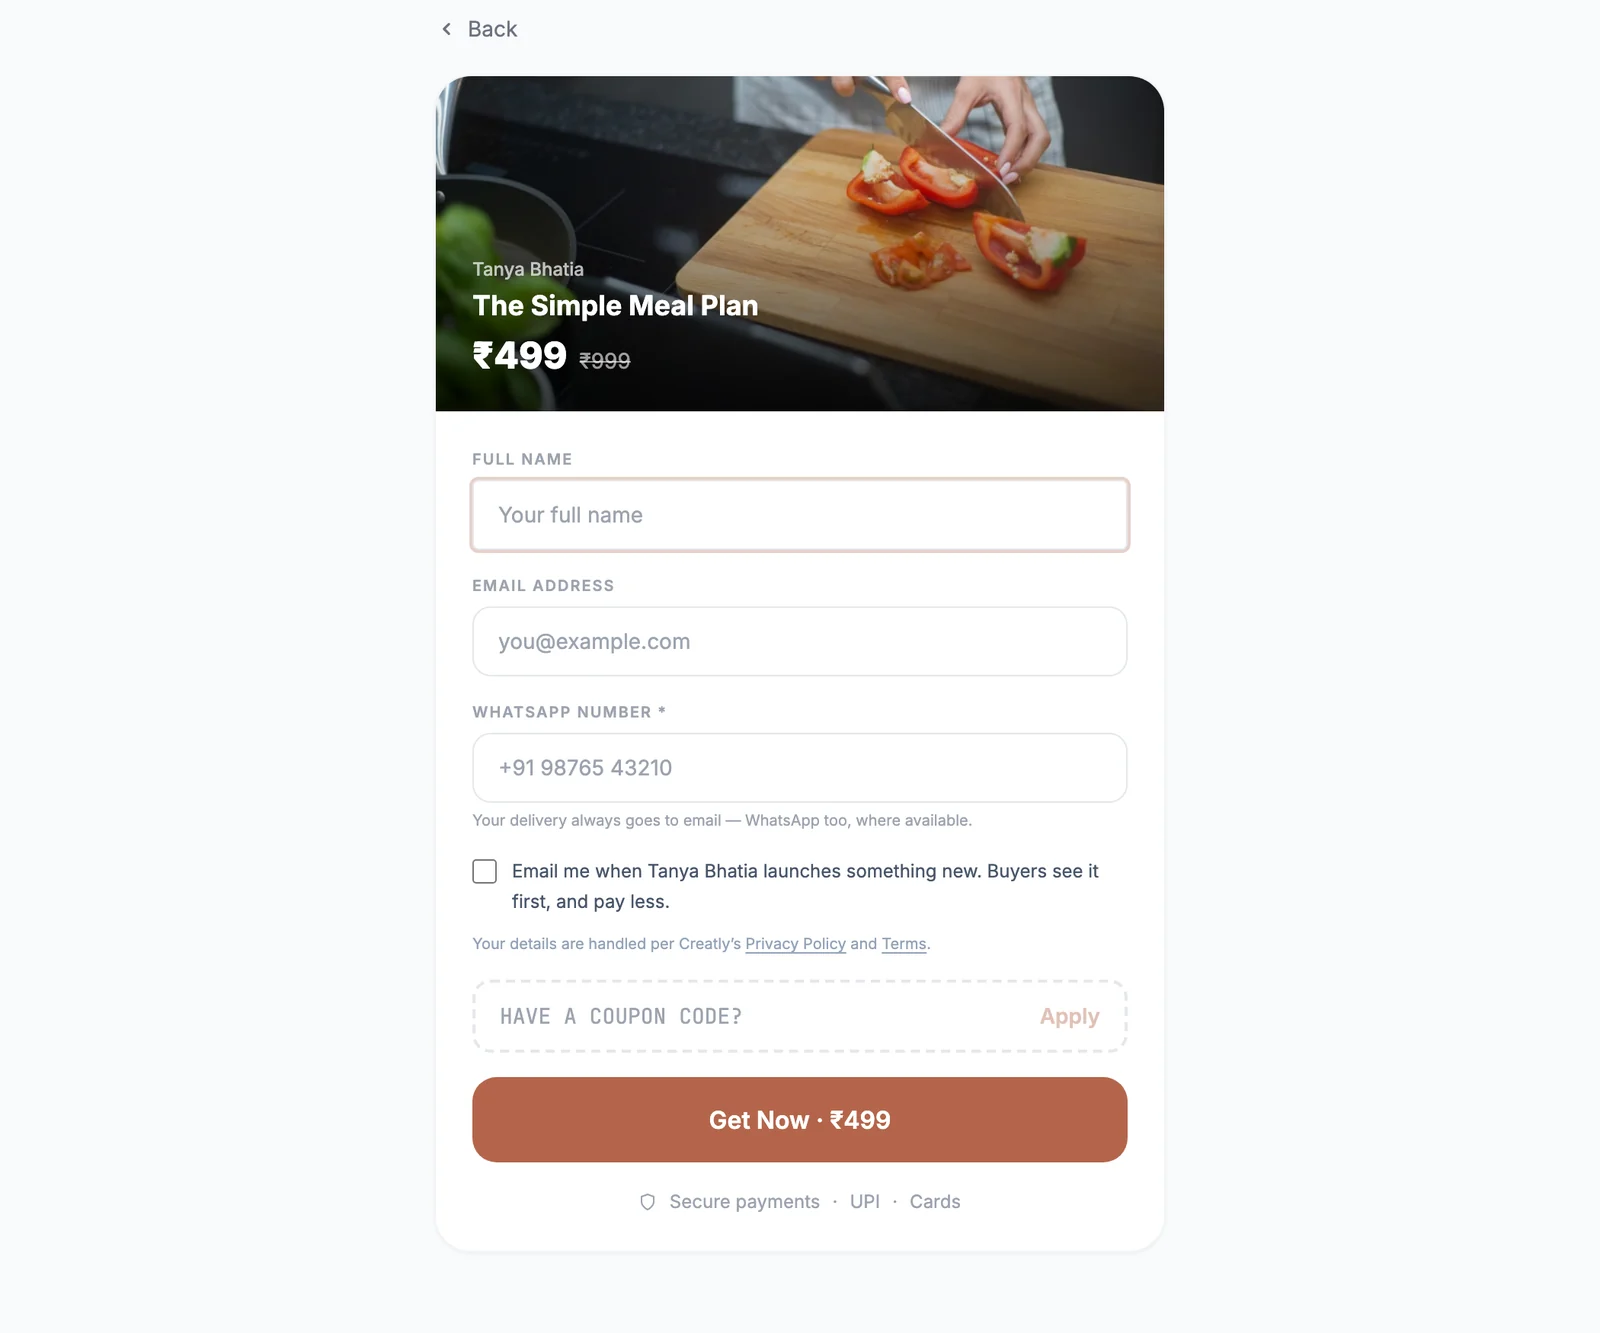
Payment clears and delivery goes out within seconds. A file becomes a secure download link. A course becomes an enrolment and a login to the player. A community becomes a join link that also adds them to your Telegram group or Discord server. A booking becomes a calendar invite with the call details. On Pro and Pro+ that lands on WhatsApp and email. On the free plan it lands by email.
You do not send the file. You do not check a screenshot against a bank statement at eleven at night. You do not add anybody to a group by hand, and you do not remove them when they stop paying. That is the part that pays for itself, long before the fee difference between plans ever matters.
Step 6: Watch the orders, and the money
Orders shows every sale as it happens: who bought, what they bought, what it was worth, and whether delivery went out. It is also the first honest feedback you will get about your product and your price.
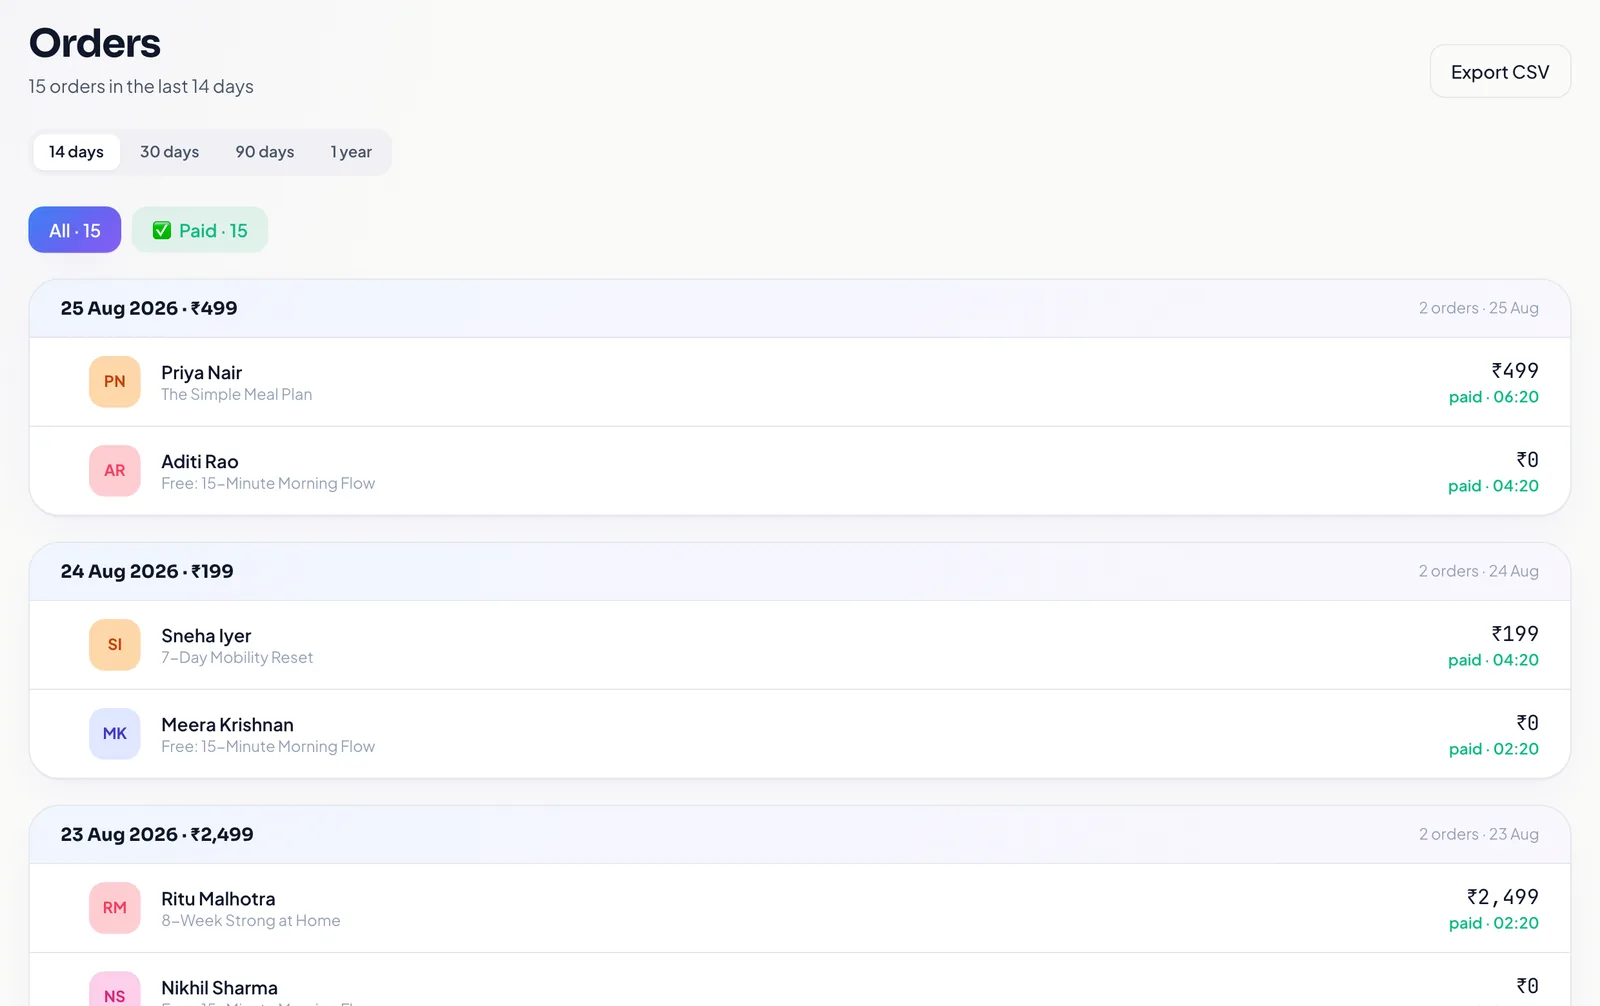
Payouts is the money view: what has settled, what is still on its way, and what has already reached your bank. Settlement is T plus two business days from each sale, so a Friday sale arrives the following Tuesday rather than over the weekend. Everything exports as CSV, which your accountant will ask for in about eleven months and you will be glad is one click.
Then the real work starts, and it is not on this platform. It is posting, emailing, showing up, and finding out which of the things you made people actually want. The store is now the part you never have to think about again, which was the entire objective.
What this costs to run
Free is a genuine place to start and not a trial: unlimited products, 2 GB of storage, and a 6% fee taken only when a sale happens. No monthly bill before you have made a rupee.
Pro at ₹499 a month drops the fee to 2%, gives you 25 GB and moves delivery to WhatsApp, which is where your buyers actually read things. Pro+ at ₹999 a month is 0% on everything you sell up to ₹1,00,000 and 0.5% after that, with 100 GB. The honest rule of thumb: stay free until either the fee or the storage starts irritating you, and you will know when.
The full comparison is on the pricing page.
Frequently asked questions
How long does it take to set up a store and start selling?
The building takes one sitting. Claiming your link, adding a product, choosing how the store looks and publishing is comfortably under an hour, and most of that hour is you writing the product description. The part with a queue in it is payout verification, which usually takes one to two business days because a real bank account is being checked. Start that first and the rest of the setup happens while it runs.
Do I need payout setup before I can sell?
Before you can be paid, yes. Your store can go live and look finished without it, which is exactly the trap: the Buy button stays disabled and checkout is blocked until your payout account is verified, so a store you shared on a launch day can be live and unable to take a single rupee. Nothing about it looks broken from your side. Do payouts before you share the link anywhere.
What do I need to hand over for payout setup?
Your full name, email and phone, whether you are setting up as an individual or a business, your PAN, your registered address, and the bank account the money should land in: account holder name, account number, IFSC and account type. GSTIN only if you have one. Nothing is charged until your first sale.
When does the money actually reach my bank?
Settlement is T+2 business days from each sale. The sale shows in your dashboard immediately and moves through to your account two business days later, so a Friday sale lands the following Tuesday rather than over the weekend. You can see every sale and every settlement in the Payouts tab, and export the lot as CSV when it is time to do your books.
What can I actually sell?
Digital files, ebooks and PDFs, full video courses with modules and a player, paid Telegram and Discord communities, one to one coaching calls with a booking calendar, webinars, memberships that bill monthly, and free lead magnets that collect emails. One store holds all of them at once, so you do not need a separate tool per product type.
How does the buyer get what they paid for?
Automatically, within seconds of payment clearing, with no action from you. A file becomes a secure download link, a course becomes an enrolment and a player login, a community becomes a join link that also adds them to the group, a booking becomes a calendar invite. On Pro and Pro+ that arrives on WhatsApp and email. On the free plan it arrives by email.
Do I need a website or a domain first?
No, and that is rather the point. Your store is a link the moment you claim your username, and that link is what goes in your Instagram bio, your YouTube description and your WhatsApp status. Plenty of people sell for months without ever owning a domain.
Can I change my store link later?
Yes, your username is editable from settings if the new one is free. Worth doing early rather than late, because every link you have already shared points at the old one and nobody updates a bio link twice.
What does it cost to start?
Nothing to open the store. The free plan gives you unlimited products, 2 GB of storage and a 6% fee taken only when a sale actually happens, so there is no monthly bill before you have made a rupee. Pro at ₹499 a month drops that fee to 2%, gives you 25 GB and moves delivery to WhatsApp. Pro+ at ₹999 a month is 0% on everything you sell up to ₹1,00,000, then 0.5%, with 100 GB.
If you do one thing after reading this, start payout verification. It is the only step with a queue in it, it costs you nothing, and it is the difference between a launch day that works and one you spend apologising for.
Choosing and pricing what you sell →
Digital product ideas that actually sell →
Selling on Instagram without a website →
Let Instagram comments send your link for you →
Plans and pricing →